
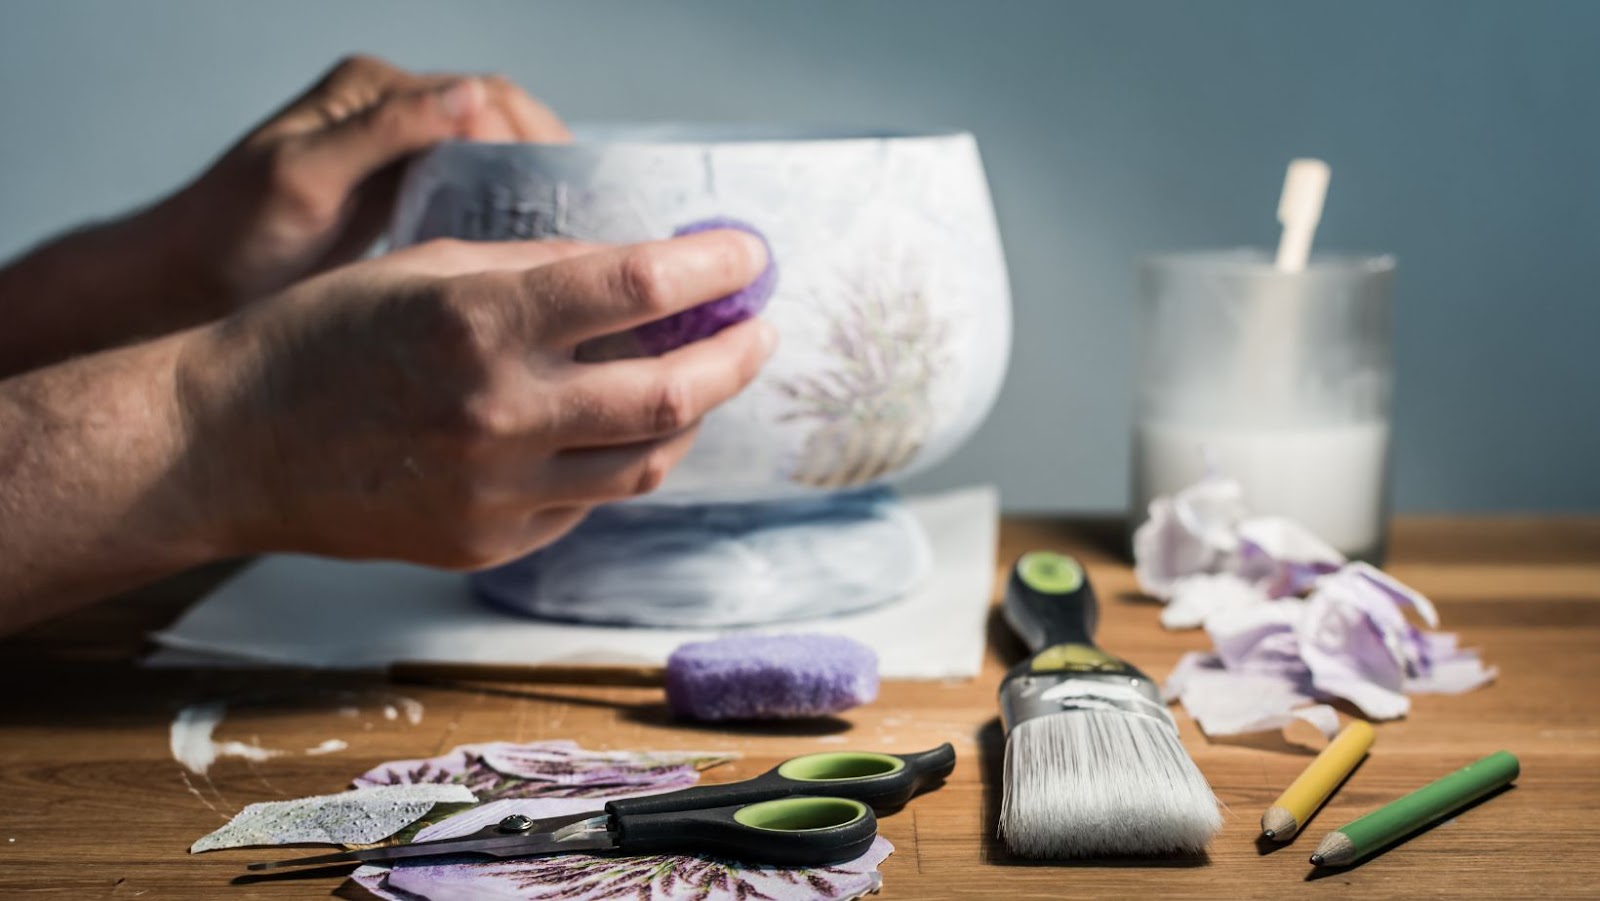
There is a wide selection of materials that can be used with decoupage glue to create unique and customized projects. Glossy mediums, napkins, tissue paper, and photographs are popular options for creating personalized designs with decoupage glue. Additionally, using lace, ribbon, and fabric scraps adds texture and depth to any project. For a more rustic look, using natural materials such as dried leaves or pressed flowers can add an organic touch to your creation. Regardless of the materials used, always ensure they are clean and dry before adhering them with decoupage glue.
To create a successful decoupage project, it’s crucial to choose the right materials. Make sure all your materials are compatible with your chosen adhesive before beginning the project. Some adhesives work better on certain surfaces than others, so if you’re unsure which adhesive is right for your project consult online tutorials or experts in the field.
When choosing materials for decoupage projects, consider the end user or recipient. Choosing colors and patterns that match their taste will make it more meaningful to them. Remember too that layering different designs can produce stunning effects; starting simple before working up to more intricate layers will improve your technique.
Ultimately, almost anything can be used for decoupage as long as you use the correct adhesive- this is what makes it such a versatile art form! Experiment with different mediums and substrates until you find what works best for you and let your creativity run wild!
Get ready to glue down some serious style with these top materials for decoupage crafting!
How to Make Decoupage Glue
For those interested in decoupage, it is essential to know the right materials to make the perfect decoupage glue. Here’s a guide to help you understand the list of materials required to make the best decoupage glue:
- Start with white glue which functions as the primary adhesive.
- Add some water to the white glue to make it a little bit thinner.
- To make the glue mixture a bit more pliable, add some vinegar to it.
- Glycerin can be added to the glue mixture for better flexibility.
- For an added shine, mix varnish with the glue mixture.
- If you want to add color to the decoupage project, add some acrylic paint to the glue mixture.
It’s worth noting that different decoupage projects may require different combinations of materials. However, it is important to experiment with the suggested materials to create the best results.
Unique details about decoupage glues include the fact that adding paper or cloth to the glue mixture can create a custom textured effect. This enhances the overall appearance of the finished product and adds character and uniqueness.
The history of decoupage glue goes back to 12th century Asia. It was considered to be a decorative method before it finally evolved into an art form. Over time, the materials and techniques used to create decoupage have changed, but the concept of pasting different materials to create a picture or design has remained the same.
Who knew a piece of paper could be the perfect wingman for your decoupage project?
Paper
For decoupage, paper serves as the primary decorative material. It can be used in different forms such as printed paper, tissue paper, or even old book pages. When selecting a paper for decoupage, it is essential to choose one that is thin and flexible so that it can be easily applied to the surface.
To ensure proper adherence of the paper to the surface, it is crucial to prepare it by cutting it into small pieces or tearing it instead of using a large sheet. This way, air bubbles and wrinkles are avoided during application. To enhance its durability and longevity, applying a layer of sealant over the paper after it has been glued is recommended.
In addition to traditional paper materials, other items such as napkins or gift wrap can also be used for decoupage projects. However, when using these materials, extra care needs to be taken as their texture and thickness may differ from regular paper.
To achieve a more unique look for your decoupage project, experimenting with different types of papers like specialty handmade papers or patterned scrapbook papers can result in stunning results. Whatever type of paper you choose; ensure that it compliments your aesthetic vision seamlessly.
Transform your old t-shirts into fabulous decoupage creations, because all it takes is a little fabric and a lot of glue!
Fabric
Using textile materials for decoupage is a popular choice among craft enthusiasts. Fabrics can add texture and depth to your artwork, producing incredible results. The easiest fabrics to work with are lightweight cotton and silk, but don’t let that limit your imagination – as long as the material is flat and thin enough to glue down without creating wrinkles, it’s fair game!
Incorporating lace or tulle into your artwork can produce interesting effects. Thin materials like gauze and chiffon also work well as they can be ruched or folded to create dimension. Do keep in mind that heavier fabrics like denim may be difficult to handle, so it’s best to start with lighter materials. When selecting fabrics, choose those with patterns or designs that would look great in combination with other pieces of art.
One unconventional option is to use coffee filters or tissue paper because they’re absorbent, affordable, and eminently versatile! By cutting them into small pieces or shapes, the filters and papers may be used by themselves or incorporated with other types of fabrics for a layered look.
Did you know that people in Asia have been using rice paper for centuries? It is made from the pith of the Asian shrub Tetrapanax papyriferus and has been used even before the introduction of wood pulp paper. Rice paper is long-lasting and resistant to ink bleeding; these qualities make it an excellent choice when restoring ancient works on documents such as paintings.
(Source: https://www.arthistoryproject.com/blog/library/5-exotic-types-of-paper-that-can-take-your-artwork-to-the-next-level/)
Why settle for plain tissue paper when you can decoupage a unicorn vomiting rainbows onto it?
Tissue Paper
- Tissue paper comes in a myriad of colors and patterns and can be easily found at any craft store.
- It can be torn or cut into desired shapes and fixed onto a surface with decoupage glue.
- While working with tissue paper, it’s important to handle it gently as it can tear easily.
- Tissue paper needs to be handled carefully during the decoupage process as moisture from the glue can cause it to wrinkle or become translucent.
- When creating intricate designs or layouts, layering tissue paper of different colors creates depth and visual interest.
Additionally, using printed tissue papers is an excellent way to add interesting designs to home decor items like lampshades and boxes.
To avoid disappointment in not being able to create your decoupage project due to lack of materials or experience with them, it is essential to familiarize yourself with the necessary tools and techniques beforehand. Don’t let the fear of missing out hold you back from exploring the creative world of decoupage using lovely materials like tissue paper and other exciting elements.
Even your messy eating habits can be put to good use with these decoupage-ready napkins.
Napkins
Fine Tissue Paper
Fine tissue paper is a commonly used material in decoupage art and refers to thin, translucent paper that is specifically designed for crafting. The delicate texture of fine tissue paper makes it perfect for creating intricate designs on various surfaces.
Points about Fine Tissue Paper:
- Available in numerous designs.
- Usually found in craft stores and online shops.
- The diversity of patterns allows artists to customize their creations.
- Cutting the paper into small pieces helps create detailed designs.
Unique Details
When selecting fine tissue paper for decoupage, it is crucial to ensure that the design complements the overall theme of the project. It’s also essential to avoid using papers that are too thick or stiff, as this may make it difficult to adhere the pieces seamlessly.
Suggestions
To get the best results with fine tissue paper, use a clear, high-quality adhesive such as Mod Podge. Additionally, consider creating layers by adding additional coats between each piece of tissue paper. This technique can add depth and dimension to your project while ensuring it remains durable and long-lasting.
Who needs therapy when you can just cut and paste your problems away with magazine cutouts for decoupage?
Magazine Cutouts
Magazine cutouts are paper images or words clipped from a magazine for use in decoupage art. They come in various sizes, colors, and textures, and are ideal for decorating surfaces like wood, glass, or metal. Using magazines as a source of cutouts empowers the artist with endless patterns, designs and themes that can be used to suit their creative expression perfectly.
- Magazine cutouts vary in sizes, textures and patterns.
- They offer an endless variety of design concepts to blend with other materials on any surface.
- Images from different themes and types of magazines can be picked for a more personalized effect .
- Magazines with shiny pages are ideal since they resist wear and tear better than regular paper.
- Delicate tools like scissors and sharp blades should be used for precise cutting.
Furthermore, artists have found innovative ways of taking full advantage of the benefits offered by magazine cutouts. They use them as components of intricate collages or incorporate them into larger artistic compositions. Each snip offers an opportunity to create intricate pieces that will leave one’s audience amazed.
In recent studies conducted by CreativeLive Agency , incorporating magazine cutouts into one’s artwork stimulates creativity while enhancing one’s mood.Regular crafters attest to feeling relaxed during these crafting sessions whereby the repetitive clipping process provides a calming effect on their minds allowing them to access deeper levels of creativity without strain.
Interestingly enough, over 100 billion newspapers are sold annually worldwide providing heaps of material to fuel this form of art.
When it comes to decoupage, a picture may be worth a thousand words, but a well-chosen print is worth the glue it’s stuck with.
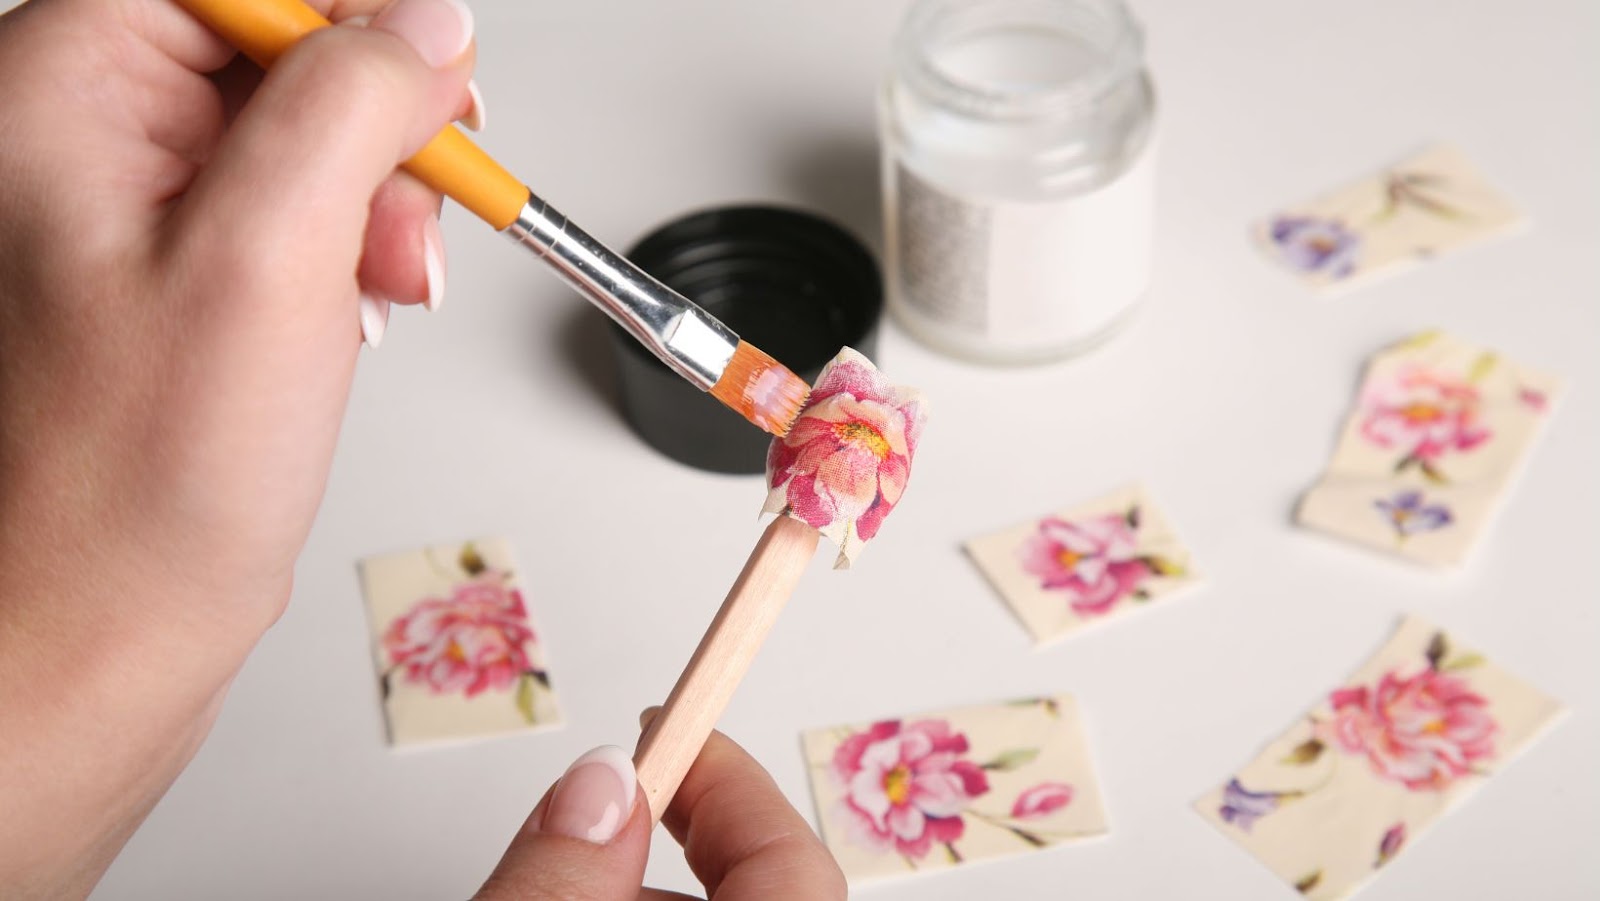
Photos and Prints
Creating decoupage crafts requires materials such as paper, cardstock, fabric, and other decorative elements. For the purpose of decoupage, ‘Prints and Images’ are a key ingredient that adds personality to the project. These can be sourced from magazines, newspapers, or even personal photographs.
To begin with the process of decoupage, it is important to decide on the prints or images that suit the theme of your project. Ensure that these have been cut out and trimmed before use. The prints should be free of any creases or tears for smooth paper application.
Various techniques can be employed to attach the print onto the surface you’re working with. Mod Podge and glue are popularly used for their pervasive adhesive properties. To make DIY decoupage glue, ingredients such as white glue, water, and vinegar can be combined for an optimal consistency.
By following these simple steps, unique and personalized decoupage projects which bring photo memories to life are possible. Don’t miss out on this opportunity to explore your creative side by experimenting with a range of ‘Prints and Images’.
When it comes to decoupage, wrapping paper is like the gifted athlete of the crafting world – versatile, flashy, and always ready to make a stunning play.
Wrapping Paper
When discussing the embellishing of items, a material commonly used is sheeting with pre-printed designs for gift wrapping that can be altered and layered to achieve a decorative look.
- It comes in various patterns and colors, making it perfect for any occasion or project.
- The paper is thin and flexible which makes it easy to manipulate into shapes.
- Wrapping paper provides a beautiful base to work on when creating decoupage crafts.
- It can be found at most stores and online retailers at an affordable price point.
Experienced crafters often recycle used wrapping paper by re-purposing it as their canvas. Furthermore, you can try adding texture elements to your design by using items like tissue paper or old magazines before layering on top of the wrapping paper. Wrapping paper’s origins date back to ancient China when they wrapped delicate objects such as porcelain vases with tissue-thin Han Paper. The concept then traveled westward in the 19th century where Europeans began using decorated tissue sheets to either wrap gifts or line newly invented cardboard boxes. Who needs wallpaper when you can decoupage your walls with old magazines and a little bit of glue?